If you’ve been playing Dinkum for a while, you know how quickly clutter can take over your island life. From wood and metals to animal parts and relics, it doesn’t take long before you’re doing what the community calls the “chest boogie” — endlessly opening and closing chests trying to find your materials. Thankfully, there’s a better way. Based on the insights from a recent community guide, here’s a detailed breakdown on how to build a clean, scalable, and highly efficient storage and crafting layout in Dinkum.
Building the Foundation: The Early Game Setup
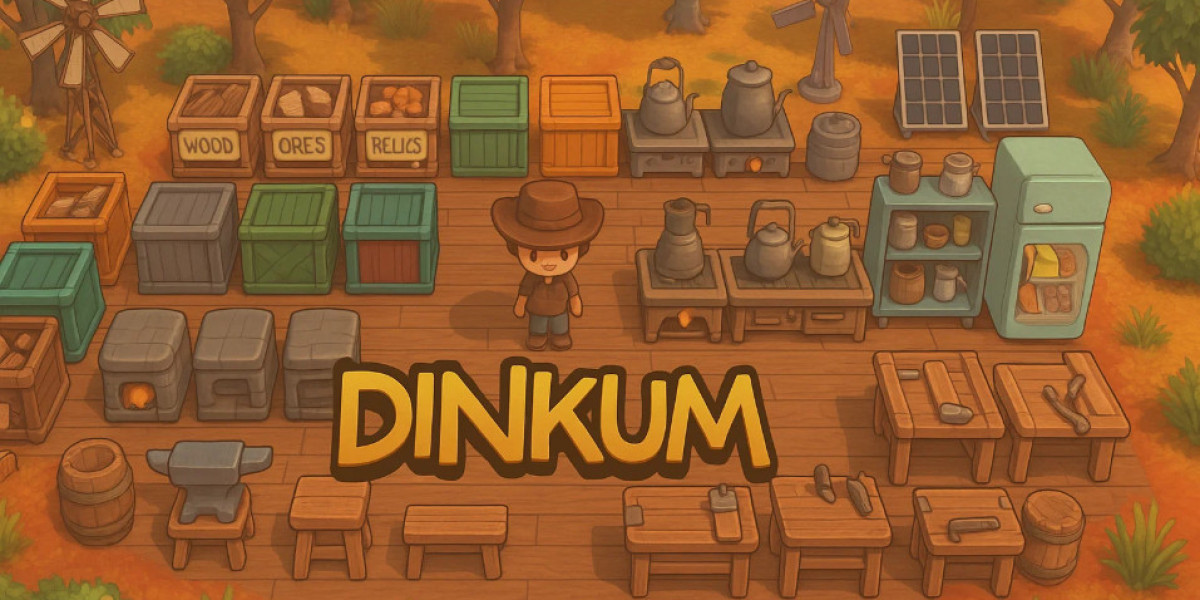
When you first start out in Dinkum, storage is extremely limited — your travel bag in Fletch’s tent is all you have. While convenient for visiting other islands, it won’t serve you for long-term organization. Once you unlock wooden crates, start creating your first proper storage area.
A good starting point is a 21–22 tile-wide workspace. This width conveniently matches the effective range of the Auto Sorder, which will later allow full automation. At this stage, focus on four essential chests:
One for wood
One for metals and minerals
One for old relics
One for animal parts
Each category helps establish logical workflows that can grow as your island develops. You can also color-code your chests using paint found in the Deep Mines — a simple but effective way to visually organize your dinkum items.
Smart Categorization and Efficient Layouts
As your inventory expands, organization becomes even more important. Group your dinkum items by type and background color — for example, all crafting materials share a similar color tone, which makes sorting intuitive.
In your metal chest, keep raw ores on the top row and refined products like bars and cement below. In the wood chest, logs sit above their corresponding planks. This visual structure helps you quickly find what you need during crafting.
Don’t forget functional placement: keep crafting tables and cooking stations close together so that resource chests are within reach. The tape measure sold by John’s shop is invaluable for setting up your workspace precisely.
Advanced Organization: Cooking, Brewing, and Automation
Mid-game Dinkum introduces more complex crafting loops. You’ll unlock appliances like kettles, billy cans, and kegs, which are essential for brewing wattle and bottlebrush brews. Keep these tools near your cooking table and store finished products close by — no more running across your base to stash items.
Refrigerated storage plays a big role, too. Use frozen chests or fridges for perishables such as eggs, milk, and meat. Players who haven’t yet unlocked the fridge can use ice blocks obtained during the winter season as substitutes.
When it comes to automation, the autoplacer (added in the Animal Tracks update) revolutionizes how you process dinkum items. It can automatically collect outputs from furnaces, grinders, and saws, drastically cutting down manual labor. If you’re short on autoplacers, prioritize connecting your most-used machines like barbecues and grain mills.
For players who want to streamline their economy, automating food processing — such as using food modelers with rice — is an excellent way to earn quick dinks while keeping your operation running efficiently.
Managing Rare, Seasonal, and Utility Items
As your island grows, so does your hoard of rare and non-stackable items. From tools and weapons to relics and furniture, it’s easy to lose track. The key is categorical separation: dedicate small chests for items like tools that need repairing, or furniture grouped by type (floors, walls, tables, etc.).
You can even use mannequins from Clover to display extra clothing instead of wasting chest space. For tools, keep only a few spares for NPC requests or visiting players — once you’ve upgraded to power tools, you won’t need basic axes or pickaxes anymore.
Late-Game Efficiency: The Auto Sorder and Beyond
When you finally unlock the Auto Sorder, your layout design truly pays off. The earlier 21x21 spacing ensures that every chest and machine falls within its effective range. This means materials can move automatically between stations, creating a self-sustaining production network.
Be sure to check that your windmills and solar panels are properly placed — they have specific service ranges, and misalignment can slow down crafting or machine processing. A central windmill will accelerate nearby machines like kettles, mills, and grinders, improving your workflow across the board.
Buying and Managing Dinkum Items Efficiently
If you prefer skipping grind-heavy phases or need a boost in specific resources, some players look to buy dinkum items through community-driven markets. While the game naturally encourages exploration and crafting, marketplaces such as U4GM offer a shortcut for those wanting to focus on building or designing instead of material farming. Whether you’re stocking up on rare crafting materials or organizing your collection, being smart about how you acquire dinkum items saves valuable gameplay time.
Mastering storage and automation in Dinkum is all about balance — efficient categorization, smart placement, and leveraging automation tools as you progress. Start small, expand logically, and plan for future upgrades like the Auto Sorder. With this setup, your island won’t just be organized — it’ll be a model of efficiency that grows alongside your journey.